.png)
Search Results
542 results found with an empty search
- Homemade Vanilla Extract
You only need 2 ingredients for homemade vanilla extract: vanilla beans and vodka. Let the vanilla beans infuse the vodka for as little as 8 weeks, but for optimal flavor, wait at least 6-12 months before using. Homemade vanilla is more cost efficient than store-bought options. < Back Homemade Vanilla Extract Prep Time: 5 minutes Cook Time: Serves: 1 cup Level: Beginner About the Recipe You only need 2 ingredients for homemade vanilla extract: vanilla beans and vodka. Let the vanilla beans infuse the vodka for as little as 8 weeks, but for optimal flavor, wait at least 6-12 months before using. Homemade vanilla is more cost efficient than store-bought options. Ingredients 6 vanilla beans (about 1/2 ounce or 15g total) 1 cup (8 ounces; 240ml) 80 proof vodka (or bourbon, brandy, or even rum) 8 ounce bottle or jar with a tight seal Preparation Vanilla extract is an ingredient in many of our baked goods. This common addition actually carries big weight—1 teaspoon completely transforms a good dessert into a great dessert . You can’t make a few staples like vanilla cake, vanilla cupcakes, or vanilla buttercream without it. Why Make Homemade Vanilla Extract? Why make vanilla extract when you can just buy it from the store? Good question. With the price of vanilla constantly fluctuating, it’s very cost efficient to make your own. Plus, you can control the strength of its flavor. This is KEY because many pricey store-bought options lack the essential depth of flavor that makes good vanilla… good vanilla. This is either because the vanilla extract is imitation and made with artificial or synthetic ingredients or brands cut back on the amount of real vanilla in each bottle. You’re not paying for good vanilla, you’re paying for the convenience of weak bottled vanilla. If you open a bottle of some store-bought vanilla extracts and a bottle of homemade vanilla, you will immediately smell the difference. And this difference directly transfers into your homemade baked goods. What You Need for Homemade Vanilla Extract All you’re doing is pouring alcohol over split vanilla beans and letting the concoction age over time. Give it a shake every now and then. It’s that easy. Vanilla Beans: You can find vanilla beans at most major grocery stores in the spice aisle. If you can’t locate them, try purchasing them online. I use and highly recommend these options—they’re also what I use when I make Vanilla sugar — Madagascar vanilla beans , these Tahitian vanilla beans , or these Tahitian vanilla beans . (Note that each is different.) I’ve made vanilla with them all. The beans are a generous size, nice and plump, high quality, and perfect for homemade vanilla. Vanilla beans labeled “Grade B” are specifically sold for extracting purposes, but I’ve made vanilla with Grade A beans and it tastes great. Use either. 80 proof Alcohol: Vanilla extract is most commonly made from vodka, but you can use bourbon, brandy, or rum instead. I usually use vodka, but the one bottle of bourbon vanilla I made 7 months ago is DIVINE. No need to splurge on expensive alcohol. This is probably the only time someone will tell you to buy the cheap stuff!! All the vanilla’s flavor is from the vanilla beans, so spend your money on those. Avoid flavored vodkas as they often contain artificial flavors, which negates the purpose of making your own pure vanilla. Glass Bottles or Jars with Tight Seal: We recommend 8 ounce bottles. These bottles have a convenient swing top with a very tight seal. Great for gifting. Sterilizing the bottles is ideal, though we’ve skipped that step with no problem in the outcome of the vanilla. If your bottles or jars don’t have any plastic pieces attached, we recommend sterilizing them before using. Funnel: A funnel is optional, but it makes pouring 100x quicker and easier. ( These funnels collapse, so they’re great for storage.) Vanilla beans are expensive, but 6 of them (a little over 1/2 ounce or 15g total) make an entire CUP (8 ounces) of vanilla extract and you can reuse the beans. Compare that to $4 for 1 ounce of store-bought extract. Non-alcoholic version? Pure extracts are made from alcohol because it’s the easiest way to extract the flavor out of the food. I’ve never made vanilla extract with a nonalcoholic alternative, but there are a few tutorials online if you give it a quick search. Single-Fold Vs Double-Fold Vanilla Extract Most store-bought vanilla extracts are what’s known as single-fold. Single-fold vanillas are weaker and to make your own, you need about 4 vanilla beans per 8 ounces of alcohol. I prefer a stronger vanilla so the homemade flavor is more prominent in desserts. Strong vanilla is known as double-fold and it’s pretty pricey because it requires a lot of vanilla beans. Since double-fold can get expensive, I opt for about 6 vanilla beans (a little over 1/2 ounce total) per 8 fluid ounces of alcohol . This is the best balance of taste and price. Confused about which type of vanilla bean to buy? Madagascar Vanilla – very common and has a creamy and rich flavor Mexican Vanilla – has a darker, almost smoky flavor Tahitian Vanilla – also very common and has a rich floral flavor Any of these are great choices for vanilla extract. Wait 6-12 Months The only things you need to remember about homemade vanilla extract are ratio and time. The ratio of vanilla beans per ounces of alcohol is imperative, but so is the amount of time the vanilla infuses the alcohol. We discussed the ratio above, so let’s chat about how long to infuse the vanilla. Homemade vanilla extract tastes better and becomes darker in color the longer it sits. This means we need to practice our patience. The wait is worth it, though. Make some today and use it 6 months from now. You’ll be even happier when a full year has passed. 12+ month homemade vanilla is incredible!! Store the infusing vanilla out of direct sunlight and give it a shake once per week. Want to know the best part of all? You can continuously add more alcohol to the bottle as you use it. See the recipe instructions below. This is truly the gift that keeps on giving! Instructions Using a sharp knife, split the vanilla beans so the beans are exposed. No need to completely split the bean in half, just slit down the middle. If the length of the vanilla beans don’t fit into your bottle or jar, cut the vanilla beans into smaller pieces. Place beans into a bottle or jar. Pour vodka on top. A funnel helps. Use a little extra vodka, if needed, so the beans are fully submerged. Shake a few times. Store vanilla at room temperature out of direct sunlight. Shake about once per week or once every couple weeks. Vanilla can be ready to use in as little as 8 weeks, but I recommend at least 6 months for optimal flavor. 12+ months is great! As you begin to use your vanilla, you can refill with a little vodka each time. Give it a shake after you refill and give it a shake before each use, too. If you’re gifting the vanilla or if you don’t have any more alcohol to refill, remove the beans completely after first use. The beans will become a little slimy if they aren’t almost fully submerged. Unused aged vanilla extract (with the beans fully submerged) will last several years. If it still smells good, it’s still good to use! Aged extract without the beans will last indefinitely. Once you begin using the vanilla and adding more alcohol after each use, the beans will eventually need to be replaced. It’s hard to give a specific amount of time as some may use (and refill) the vanilla more quickly than others. After about 1 year of frequent use and refilling, you will find the vanilla flavor less intense. Simply remove old beans, add fresh beans, shake, and continue to use/refill. Notes Special Tools (affiliate link): Madagascar Vanilla Beans , these Tahitian Vanilla Beans , or these Tahitian Vanilla Beans | 8-ounce Glass Bottles | Funnel Seeds: Since the vanilla beans are exposed (slit open), there will be vanilla bean seeds in the bottle and therefore in your baked good. They add even more wonderful flavor! Use the same amount of homemade vanilla extract as you would store-bought in recipes. Gifting: I usually remove the beans if I’m gifting the bottle, that way the gift recipient isn’t responsible for refilling with more alcohol and the beans don’t go to waste. (You can reuse the beans for a new bottle.) However, if it’s been less than 6 months, I recommend gifting with the beans in the bottle because there’s still lots of flavor in there! Tell the gift recipient to remove the beans once he/she begins using the vanilla. Alcohol: If baking gluten free, use certified gluten free alcohol. Avoid flavored vodkas as they often contain artificial flavors, which negates the purpose of making your own pure vanilla. Sterilizing: Sterilizing the bottles is ideal, though we’ve skipped that step with no problem in the outcome of the vanilla. If your bottles or jars don’t have any plastic pieces attached, we recommend sterilizing them before using. The pictured bottles have a removable plastic topper piece. You can soak any plastic pieces in very hot soapy water, and dry completely before using Previous Next
- Easy Shepherd's Pie
Childhood comfort EASY hearty dinner! Also great a freezer dinner! < Back Easy Shepherd's Pie Prep Time: 20 minutes Cook Time: 20 mintues Serves: 4 Level: Beginner About the Recipe Ingredients 1 pound ground beef 1 can tomato soup 1 can green beans 1/2 teaspoon fresh or garlic powder (to taste) 1/2 teaspoon rubbed sage (to taste) Salt and pepper to taste Mashed Potatoes Topper 5 medium sized russet potatoes , or 6 large red potatoes 1/2 cup milk 4 tablespoons melted butter Salt and pepper to taste 1+ cup shredded cheese Preparation Heat oven to 375ºF. Brown meat in a large skillet; strain, then rinse with hot water. Return meat to the skillet. Add spices, green beans and tomato soup; mix well. Spoon into a 9x13 casserole dish. Boil potatoes in salted water until they are fork tender. Once cooked, strain potatoes, put into a bowl and mash. Mix in butter, milk, and salt and pepper until blended. Spoon over the meat mixture. Cover potato topping with cheddar cheese Bake for 20 minutes, or until heated through and the cheese is melted.. Previous Next
- Homemade Strawberry Pop-Tarts
Skip the foil packs from the store and make your own Homemade Strawberry Pop Tarts! These pop tarts are filled with REAL strawberry jam and topped with an easy frosting < Back Homemade Strawberry Pop-Tarts Prep Time: 1 Hour Cook Time: 15 Minutes Serves: 10 Pop-Tarts Level: Beginner About the Recipe Ingredients For the Crust 2 ½ cups (310 g) all-purpose flour 1 Tablespoon granulated sugar ½ teaspoon table salt 1 cup (226 g) unsalted butter cubed and very cold ½ cup (120 g) sour cream (may substitute plain full-fat Greek yogurt) For the Filling ¼ cup granulated sugar 2 teaspoons cornstarch 8 oz (226 g) strawberries quartered (see note to use different fruit) 2 teaspoons lemon juice ½ Tablespoon butter salted or unsalted Egg Wash 1 large egg 1 teaspoon water For the Glaze 1 ½ cups (190 g) powdered sugar 2 Tablespoons milk 1 Tablespoon light corn syrup see note ¼ teaspoon vanilla extract Nonpareils sprinkles, or coarse sanding sugar for decorating, optional Preparation As the before or after school snack of so many childhoods, pop tarts have a special place in our hearts. With an ever-changing variety of flavors, shiny foil wrappers, and quite possibly the easiest preparation ever, store-bought pop tarts might seem hard to beat–but today’s recipe proves otherwise! My homemade strawberry pop tarts have a delightfully flaky (not crumbly) golden brown crust, a bright strawberry jam filling, and a firm, tasty icing that is totally foolproof. Oh, and did I mention they have no preservatives , artificial colors , or artificial flavors ? Once you taste these, you won’t be reaching for the store-bought version anytime soon! When developing this recipe, I opted to use my versatile and foolproof homemade pie dough for the crust. Not only is it buttery and tender, it’s also SO simple to bring together with absolutely no guesswork required. The strawberry jam filling is quick and easy too, taking just a few minutes on the stove. And finally, the glossy, perfectly set icing. Let’s get started! For Crust Combine flour, sugar, and salt in the basin of a food processor.2 ½ cups (310 g) all-purpose flour,1 Tablespoon granulated sugar, ½ teaspoon table salt. Scatter butter pieces evenly over the surface of the flour mixture and pulse until the butter is cut into the mixture and your mixture resembles coarse crumbs. You should still see some pieces of butter remaining, some may be as large as chocolate chips, this is fine!1 cup (226 g) unsalted butter Add sour cream and pulse until sour cream is incorporated, flour is absorbed, and mixture is beginning to cling together.½ cup (120 g) sour cream Remove dough from the food processor (be careful of the blade!) and transfer to a piece of plastic wrap. Form into a ball then flatten into a disk. Chill for at least 30-60 minutes before rolling out. In the meantime, prepare your filling. For Filling Combine sugar and cornstarch in a small saucepan and whisk together until combined. ¼ cup granulated sugar,2 teaspoons cornstarch Add berries and lemon juice and stir to combine.8 oz (226 g) strawberries,2 teaspoons lemon juice. Transfer saucepan to stovetop over medium-low heat and cook, stirring constantly, until the berries release their juices and begin to soften. Mash them with a potato masher or large fork until no large pieces remain. Stir while the mixture bubbles and cook until it begins to thicken and begins to approach a jelly-like consistency. Note that the filling will continue to thicken as it cools. Once the filling begins to thicken, remove from heat and stir in butter until completely combined. Set aside and allow to cool completely before filling the pastry (you can speed up the process by placing the filling in the refrigerator) . ½ Tablespoon butter Assembly Once dough has chilled and the filling has cooled, preheat the oven to 400F (205C) and line a baking sheet with parchment paper. Prepare egg wash by thoroughly whisking together egg and water.1 large egg,1 teaspoon water Transfer pie crust to a clean, lightly floured surface and dust with additional flour as needed. Roll dough into a rectangle about ⅛-¼” thick then cut into 2.5”x4” (6x10cm) rectangles (I use a rectangular cookie cutter to do this, but you can just use a sharp knife or a pizza wheel!). Place one rectangle on the prepared baking sheet and lightly brush the surface with egg wash. Drop a rounded Tablespoon of strawberry filling into the center, then top with another rectangle of dough. Use a fork to crimp the sides to seal, then brush the surface of the dough with egg wash. Use a toothpick or wooden skewer to poke 6-8 holes in the surface of the pop tart to allow it to vent. Repeat steps above until you have formed all of your pop tarts, then transfer to a 400F (205C) oven and bake 15-17 minutes and begin to turn golden brown. Allow pop tarts to cool on a baking sheet before decorating with icing. Icing Combine sugar, 1 Tablespoon of milk, corn syrup, and vanilla extract and whisk until combined. If the mixture is too thick, add remaining milk as needed until smooth (if icing becomes too thin, you can always thicken it with a bit more powdered sugar). Icing has reached ideal consistency when you lift the spoon from the icing and the ribbon that drizzles off the spoon holds its shape for several seconds before dissolving back in the bowl.1 ½ cups (190 g) powdered sugar,2 Tablespoons milk,1 Tablespoon light corn syrup,¼ teaspoon vanilla extract Drizzle icing over the center of the pop tarts and top with sprinkles, if using. Allow frosting to harden before serving and enjoying. Previous Next
- Homemade Hot Cocoa Mix
Easy, delicious hot chocolate! < Back Homemade Hot Cocoa Mix Prep Time: 5 min Cook Time: 10 min Serves: Level: Beginner About the Recipe Ingredients 2 Cups nonfat dry milk powder* ¾ cup sugar ½ cup powdered cocoa ½ cup powdered non-dairy creamer Dash of salt Preparation In a large mixing bowl, combine all ingredients. Blend well. Store in a tightly covered container. 3 ¾ cups of mix will make approximately 15 cups of delicious hot cocoa. To serve use ¼ cup cocoa mix and add to ¾ cup hot water. Serve.
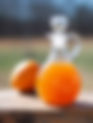
- 2-Ingredient Fermented Oranges
Preserve oranges when they're in season using the lacto-fermentation method. You'll be happy to have the bright flavor of citrus in a ready to use form for cooking! < Back 2-Ingredient Fermented Oranges Prep Time: 15 Minutes Cook Time: 5 Minutes Serves: 1 Quart Level: Beginner About the Recipe Preserve oranges when they're in season using the lacto-fermentation method. You'll be happy to have the bright flavor of citrus in a ready to use form for cooking! Ingredients 5-6 medium-sized oranges 3 tablespoons salt (sea salt or kosher) Preparation Cut the fruit Make four equally spaced, vertical cuts almost to the center of the fruit. You want the core to hold the fruit together, but the deep cuts allow salt to enter the fruit. Alternatively, cut each orange into eighths. For traditionally cut fruit Sprinkle a teaspoon of salt on the bottom of the jar. Put a teaspoon of salt in the center of each fruit. Add fruit to the jar, pressing down to release the juices and pack tightly. When the jar is full, press to make sure the solids are covered with liquid. If necessary, top off with filtered water. Place a weight on the fruit to hold it under the liquid and screw a lid on loosely. Ferment at room temperature for 2-3 weeks. For fruit pieces Sprinkle a teaspoon of salt on the bottom of the jar. Place eight pieces (one entire orange) into the jar and sprinkle on one teaspoon of salt. Continue layering in this manner, pressing the fruit to release juices. When jar is full, press to make sure the solids are covered with liquid. If necessary, top off with filtered water. Place a weight on the fruit to hold it under the liquid and screw a lid on loosely. Ferment at room temperature for 2-3 weeks. Notes You don’t need any sort of starter culture for this recipe, but if you have liquid left over from another fermenting project, you can add a tablespoon or two to help kickstart the fermentation process. If you’re inspired to get creative, you can feel free to add a variety of dried spices. Black peppercorns, bay leaves, cloves, and cardamom are all possibilities. This recipe can be made in upcycled jars. Theres no need to use a mason jar (though you can). I do NOT recommend using a pretty wire bail jar, as the salt in the brine will cause the wire to rust. If you reuse a jar with a metal lid, place a piece of waxed paper between the lid and the jar . You can use this recipe to ferment a variety of citrus: lemons, tangerines, grapefruit are all game. Previous Next
- German Creamy Sausage, Potato, and Sauerkraut Soup
Old time German comfort food at its best! < Back German Creamy Sausage, Potato, and Sauerkraut Soup Prep Time: 20 minutes Cook Time: 30 minutes Serves: 8 Level: Beginner About the Recipe Ingredients 4 tablespoons butter 1 medium onion, finely diced ¼ cup flour 1 ½ cups chicken broth 2 ½ cups milk 1 14oz. Polska Kielbasa, halved and sliced 1 ½ cups cooked diced potatoes 1 cup sauerkraut ½ teaspoon dried parsley 1 cup shredded cheddar cheese Black pepper, to taste Preparation In a large saucepan, melt butter over medium heat. Add onions and sauté for about five minutes until tend or translucent. Add flour and stir until completely combined. Cook for one minute and then add the chicken broth and milk. Turn heat to medium high and cook, stirring often until broth begins to thicken. Reduce heat to medium and add kielbasa, potatoes, sauerkraut, and parsley. Simmer for five minutes and then add the cheddar cheese. Stir to combine and remove from heat. Sprinkle with black pepper and serve hot. So hearty, so good. This would be perfect served with the Mile High Biscuits! Yum, yum! Previous Next
- Beef Stroganoff Food Storage Style
Easy and convent meal that you can keep all the ingredients in your food storage! < Back Beef Stroganoff Food Storage Style Prep Time: 5 minutes Cook Time: 15 minutes Serves: 6 Level: Beginner About the Recipe Ingredients 1 lbs ground beef 1 large handful of spagetti noodles 2 cans Cream of Mushroom Soup 1 Tablespoon Garlic Grandulated Powder 1 Tablespoon Onion Powder 2 teaspoon Black Pepper (to taste) 2 teapsoon Salt (to taste) 1/8 cup milk Preparation Start boiling water, add a dash of salt to water Cook the hamburger in a seperate pan Once hamburger is cooked, take out of skillet and you can strain the grease if you want. Put the 2 cans of Cream of Mushroom in the skillet and start mixing enough milk to make thick gravy. Once milk and soup are combined add garlic, onion, salt and pepper. Add hamburger back in the mix thouroughly, make sure that you taste it! It needs to be strong, because once you mix with the noodles it dulls the flavor out! And who wants that! Check on noodles and I like them aldente! Mix together, call everyone to the table and serve up! https://video.wixstatic.com/video/1acc64_3e2f30f2ca6b489d9d50d69fe6b91c43/1080p/mp4/file.mp4 Previous Next
- Homemade Yogurt
It's easy to have homemade yogurt, as long as you follow a few key steps. < Back Homemade Yogurt Prep Time: 20 Minutes Cook Time: N/A Serves: 8 Level: Beginner About the Recipe Ingredients 1/2 gallon (1.8 liters) milk (see note) 2 tablespoons (30ml) yogurt with active live cultures (see note) Preparation Making Yogurt: Step-By-Step There's more than one kind of yogurt. The style you end up with will depend on a variety of factors—the milk you use, the starter you use, the temperatures and times of the culturing process, the vessel in which you make it, and whether you strain it for an even thicker product, à la Greek yogurt and labneh (more on all of this below). By playing with the variables at your disposal, you'll be able to dial into the style you like most. It's a personal journey toward the very best yogurt of your dreams. These are the basic steps. Step 1: Choose Your Milk The milk you use will have a huge impact on your final yogurt. Let's start by looking at the obvious variables, like fat percentage. I prefer whole milk, both for yogurt and, well, life, but you can use 2%, 1%, or skim, as well. They all work. Some folks like to bulk up leaner milks with some dry nonfat milk powder (roughly from 1/3 to 3/4 cup powder per quart of milk) to thicken it, especially in the absence of luscious dairy fat. You can also thicken your yogurt by adding a small amount of unflavored gelatin (1 teaspoon per quart of milk) before scalding the milk in step four, below. You don't have to add either of these things, and I'd suggest starting out by not adding them, but it's something to play with over time as you seek your own house style. Beyond fat percentage, there's the milk's origin and processing to consider. Most types work. You can use raw milk, if available, or pasteurized milk; grass-fed milk or milk from cows raised on feed; homogenized milk or creamline milk (Homa of White Moustache recommends stirring the cream in only after the yogurt has been made for the best texture). The one kind of milk that routinely gets a bad rap is ultra-pasteurized milk, which most major organic brands are, as well as the UHT milks that are shelf-stable at room temperature when unopened. I've managed in my tests to successfully make yogurt using ultra-pasteurized milk, but my limited success doesn't disprove the wisdom of more experienced yogurt makers that it's a more difficult kind of milk to work with. I'd avoid it. Step 2: Choose Your Starter The starter is the set of bacterial cultures that will ferment the milk's natural lactose sugars into lactic acid, thickening the milk and souring it at the same time. There are a million options. You can buy freeze-dried starter cultures, which look like powder, or you can use a plain store-bought yogurt with live active cultures. Store-bought is easier, plus you get some extra yogurt out of it, but your options are limited to what's on supermarket shelves. Freeze-dried starter cultures come in wider varieties. I've had good experience with the products from Cultures for Health. They sell basic yogurt cultures, plus ones tailored for specific yogurt styles, like Greek and Bulgarian yogurt, as well as a handful of heirloom varieties. Some of the heirloom varieties they offer are mesophilic, meaning they do their work at room temperature (as opposed to the more common thermophilic cultures used in most store-bought yogurt, which requires a warmer environment); this can take longer and often produces a runnier yogurt than thermophilic cultures. I had mixed success when attempting to make some of those mesophilic cultures during my testing, as you can see in the photo above, in which some of the samples separated into distinct layers of curd and whey. For most people starting out, a good store-bought yogurt with live active cultures, such as Fage, will be easy to procure and will yield great results, but, once again, you're free to experiment and find what you like best. Step 3: Scald the Milk With your ingredients chosen, the first actual step in the process of making yogurt is to scald the milk by bringing it up to about 180 or 190°F (82 to 88°C). Of all the variables I tested, skipping the scalding step was one of the few that led to near-certain failure. Scalding does a few important things. First, scalding the milk helps kill off any unwelcome microbes that may have found their way into it. The less your starter culture has to compete with, the better. But this isn't the only reason to do it—otherwise, ultra-pasteurized milk would be a lot more successful. That leads us to the single most important thing scalding does: It denatures the whey protein lactoglobulin. According to Harold McGee in On Food and Cooking , lactoglobulin, once denatured, gathers on the surface of the milk's casein proteins. This coating of lactoglobulin acts as a barrier, making it more difficult for the casein proteins to bind to each other in small, tight-knit groups, which would form a lumpy, broken curd, not the smooth one we expect of yogurt. Instead, the caseins bond more loosely into an interconnected network that makes for a consistent, gelled mass. How long you scald the milk determines how much water in the milk is allowed to cook off, concentrating the milk proteins and fat and resulting in a thicker texture. This is another one of those levers you have at your disposal: scald the milk more briefly for a looser yogurt, or hold it at the higher temperature for upwards of 30 minutes to concentrate it. Just be careful to scrape the bottom of the pot during this step, or you'll end up scorching the milk and infusing the yogurt with a burnt taste. Step 4: Cool the Milk If you were to add your starter culture to the hot milk, you'd kill it and then you'd have no yogurt. So you need to let the milk cool down to a temperature zone in which the lactose-eating bacteria can survive and thrive. Going by a thermometer, that's around 105 to 113°F (41 to 45°C), or you can just do it by touch: When you can comfortably hold your finger in the warm milk for three to five seconds, it's about right. Step 5: Add the Starter Freeze-dried starter cultures can be stirred right into the milk. If using yogurt as your starter, it helps to thin it first with some of the warm milk so it can disperse evenly, then stir that into the pot. Step 6: Incubate This is the big moment, when your liquid milk transforms into thick cultured yogurt. To make it happen, you merely need to give the milk and bacteria the opportunity they need to do their thing. Throughout much of my testing, I obsessed with creating the most temperature-stable environment possible, worrying about fluctuations of even a couple degrees. You have more latitude than that—that, really, was Homa's point. This isn't to say the incubation temperature doesn't matter. It does, and it can affect the final yogurt, but it's more complicated than simply holding a single "perfect" temperature without variation. Here's what happens during this phase: The lactose-eating bacteria produce lactic acid as a byproduct, which begins to sour the milk. As the pH drops and the milk grows more acidic, the milk proteins begin to bond and gel (which the scalding step helped prep for). How quickly the bacteria eat the milk sugars and produce lactic acid is connected to the temperature of the milk. The warmer it is, the faster they'll do it. This means that you can hold the cultured milk at 110°F (43°C) and have the milk gel within a few hours. According to McGee, though, you can go lower—as low as 86°F (30°C)—and still get yogurt. It'll just take a lot longer, upwards of 18 hours. The lower the incubation temperature, the more delicate the final yogurt will be, but it'll also hold onto the whey better without weeping and breaking quite so easily. But the timing also depends on how strong your starter culture is in the first place. A weaker culture with a lower concentration of healthy live bacteria will require more time to take hold in the milk, while a more robust culture will work more quickly. I think this was Homa's point when she told me to just let the culture do its thing: There are variables you can control, but you also need to allow for variations in what is quite literally a living food. Not all batches will act the same under equal conditions. According to Homa, my initial troubles with making a culture that could span generations of yogurt batches were likely related to the strength of the culture I was using. "Even if you set the yogurt in your first batch and get a good result, you may still not have a potent culture. It'll work, but not on the second round." She encouraged me to let go of a rigid culture schedule, in which I was incubating the yogurt at 110°F for eight hours, then moving the successfully set yogurt to the fridge. Instead, she advised giving it time to let the process happen more gently but more fully, leaving the yogurt to sit out longer at room temperature even after it had set and allowing it to become more sour and potent. After that, she said I should let it ride for a few days longer in the fridge. "I think the more you let it just be , even in the refrigerator, the more potent it'll get and the less fragile." It was the magic advice, and it's what finally helped me break through to a culture that could last much, much longer. Ah, but how does one incubate the yogurt? Well, there are many ways, and many devices out there you can invest in to do it. You could buy a dedicated electric yogurt maker, though I'm allergic to space-hogging, single-use devices like that. Some people set up a cooler filled with warm water (right around 110°F or so) and hold jars in there. I found that an immersion circulator works well for holding a consistent temperature for the jars. You can wrap the jars of warm cultured milk in towels to insulate them, or set the jars in a turned-off oven with its light switched on to generate just a bit of ambient heat. You can even combine the towel and oven method. You can also use a slow cooker or a multi-cooker like the Instant Pot , though I didn't love the results I got from mine (it made a weepy and metallic-tasting curd). Perhaps my favorite method, though, was the most traditional: a clay Indian yogurt pot. Pour the warm cultured milk into one of those, then set it in a warm spot. The clay allows moisture to escape, subtly thickening the yogurt as it sets. The results are magical, leading to a strained or semi-strained yogurt without any additional steps. One warning: In my early attempts, I scald the milk in the clay pot, which you technically can do. I don't recommend that, though. The milk seeps into the clay and is almost impossible to prevent from burning, leading to off flavors later. Step 7: Strain (Optional) If you want a thick, spreadable yogurt like labneh or Greek yogurt, you'll want to strain it after it's fully set. To do this, spoon the yogurt into a fine-mesh strainer lined with cheesecloth or a large coffee filter and set it over a bowl. The whey will drip out, filling the bowl below. Your yield will decrease, though it's impossible to say by how much; it all depends on how much whey you allow to drip out. Remember, too, that you can use the whey. You can drink it, bake with it, feed it to your cats, and more. No need to send it down the drain. Step 8: Refrigerate Once you have a well-cultured, fully set yogurt, it should finally go into the fridge. The cooler temperatures will slow down the bacterial activity, ensuring the yogurt doesn't over-sour, and will keep the yogurt in good condition for longer. As Homa pointed out, the yogurt culture will get ever so slowly stronger after a few days in the fridge, so give it some time if you can. Step 9: Repeat Save a few tablespoons of your batch so that you can inoculate your next one. After all, that's the whole point! Eat the yogurt on its own, or incorporate it into your next cooking project. Directions In a medium saucepan or saucier, heat milk gently over medium heat until it reaches 180°F (82°C) on an instant-read thermometer. Keep the milk between 180 and 190°F (82 to 88°C) for at least 10 minutes and up to 30 minutes (how long you hold the milk at this temperature will change how much water steams off and how concentrated the milk proteins and fats end up, changing the final texture of the yogurt; there's no one right way to do it). Allow the milk to cool to about 110°F (43°C). In a small bowl, stir together the yogurt with a few spoonfuls of the warm milk, then scrape the yogurt mixture into the pot of lukewarm milk. Stir well to distribute the yogurt culture. Transfer the cultured milk to glass jars, the vessels of a yogurt maker, an Indian clay yogurt pot, or whatever incubating device you may have, such as a slow cooker or Instant Pot. Cover the jars and keep warm; how you do this depends on what you have at home. You can submerge the jars up to their necks in the temperature-controlled water of an immersion circulator (set to 110°F or the incubation temperature of your choosing); place them in a turned-off oven with the light switched on; wrap them in kitchen towels and hold them in a warm place; submerge them in 110°F water held in a cooler; use a yogurt maker, etc. How long it takes the yogurt to set will depend on the temperature at which it is held. This can be as short as 3 or 4 hours and as long as 18 hours. Once the yogurt has set, allow it to sit out at room temperature for up to an additional 12 hours to ensure a strong culture; if you're working with a culture you know well, you may not need to let it sit out for so long, especially if you don't want it to grow too sour. There's no one good rule here except to give the yogurt the time it needs to sour and thicken properly. Transfer the yogurt to the refrigerator and, if you can, let it set for another 2 or 3 days before eating it (all this time is simply to allow the culture to grow strong). Strain it to make Greek yogurt , if desired. If you plan to use this yogurt to inoculate future batches, make sure to set a few tablespoons aside. Special Equipment 3-quart saucier , glass jars Notes You can use milk of any fat percentage, though whole milk will yield the richest results; you can also use homogenized or creamline milk; pasteurized milk will work, but try to avoid ultra-pasteurized products, which can have trouble setting properly. You can use any store-bought plain yogurt with active live cultures, or spoon some of your homemade yogurt into a future batch. If you use a freeze-dried yogurt culture, follow the manufacturer's instructions. Make-Ahead and Storage The yogurt can be refrigerated in sealed containers for up to two weeks (though you should use it to culture a new batch after no more than one week to ensure the culture is still strong). Previous Next
- Korean Steamed Eggs
Korean steamed eggs (gyeran jjim) is a delicious & easy side dish! Eggs are mixed with water or broth then steamed until light & fluffy! It's also called volcano steamed eggs because of their volcanic cone shape and the steam that releases from the eggs. < Back Korean Steamed Eggs Prep Time: 5 Minutes Cook Time: 5 Minutes Serves: 4 Level: Beginner About the Recipe Ingredients 4 large eggs 5 Tablespoons water or broth - see Note 1 ⅓ teaspoon sea salt 1 teaspoon toasted sesame oil pinch of black pepper chopped green onions - for garnish sesame seeds - for garnish Preparation WHAT IS KOREAN STEAMED EGGS (GYERAN JJIM)? Korean steamed eggs, also called 'Gyeran Jjim' in Korea, is a delicious and easy Korean side dish that's made with eggs, water or broth, and seasoned with salt, sesame oil, and green onions. ('Gyeran' translates to egg in Korean and 'Jjim' translates to steamed, hence the name Korean steamed eggs.) This egg side dish (banchan) can also be called Korean volcano steamed eggs because of it's volcanic cone shape and the steam that's released during the cooking process. Steaming the eggs results in the eggs expanding in the center as it heats up and cooks. It not only does it result in an impressive presentation, but it gives you extra fluffy, soft, and light as air eggs that are perfectly tender. INSTRUCTIONS Mix the eggs, water/broth, and salt until the whites and yolks are well combined. Optional: For a finer texture, you can strain the mixture. Pour the egg mixture into a small pot heated over medium heat. Using a spoon, mix the eggs while scraping the bottom and sides. You should start to see the mixture thicken up as the eggs cook. When the eggs are about 75% cooked, lower the heat and cover with a domed lid or a heat safe bowl to steam the eggs. Be sure there's enough room for the egg to expand as it steams. After 2 to 3 minutes, you should start to see steam escaping from the cover. Uncover and garnish with green onions, sesame seeds, sesame oil, and pepper. The steamed eggs should be light and fluffy. Serve immediately and enjoy! RECIPE TIPS Korean steamed eggs are traditionally cooked in an earthenware pot (ttukbaegi). If you don't have one, use a pot that holds onto heat well, such as a heavy bottomed pot. When cooking the eggs, allow large curds to form to give structure and support to the steamed eggs. This helps reduce deflation. Lower the heat before steaming the eggs to prevent them from burning. The cover should fit tightly over the pot to allow for proper steaming. Serve immediately to enjoy the full height of the steamed eggs! Some deflation is naturally similar to a soufflé. Previous Next
- Desserts
Classically easy homemade recipes and snacks! Desserts Beginner Blueberry Crumble Layers of plump and juicy blueberries covered in a crumbly, buttery, nutty topping and piled high with vanilla ice cream or whipped cream (sigh...). This is my favorite crumble because: (1) it tastes incredible (2) it's not overly sweet; a perfect balance of sweet and sour (3) this blueberry crumble is so so easy to prepare! You don't have to blanch the fruit, or peel the skin, pit, or slice anything. It's done in 5 easy steps. Beginner Apple Fritter Cake This apple cake is easy to make and is just like the old fashioned donut! Beginner Upside Down Cakes We Have Different Upside-Down Cakes For All Your Tasty Needs! Beginner Water Pie Discover the magic of water pie. A Great Depression era recipe, it takes simple ingredients to create this deliciously creamy and buttery pie. You won’t believe one of the main ingredients is water! beginner Apple Upside Down Cake This apple upside-down cake is a wonderful twist on an old favorite. Will have your mouth watering as it bakes, because it smells as good as it tastes! Large and tasty enough for family gatherings, potlucks, parties, etc. Beginner Blackberry Upside Down Cake This blackberry cake is easy to make with ingredients you have on hand. Great to take to a party or picnic. Use a cake plate that is wider than the cake; the berries and juice run down the sides when it is turned upside-down. It looks gorgeous when done! Beginner Blueberry Upside Down Cake This blueberry upside-down cake recipe starts with a lemony cake that's baked over scrumptious blueberries in a springform pan. It's then inverted so the blueberries are on top! Serve warm with fresh whipped cream. Beginner Pear Upside-Down Graham Cake I had some freshly picked pears and graham flour to use up and I combined them into this not-too-sweet, whole grain cake. The graham flour adds really nice nutty, honeyed notes, but if you can't find it, you can use whole wheat flour. Beginner Pineapple Upside Down Cake Can you imagine a world without pineapple upside-down cake? Neither can we! And this recipe is by far the greatest of all time. Brown sugar and butter create a rich, caramel glaze that coats juicy pineapple rings, maraschino cherries and a golden-brown cake—what’s not to love? But the true secret to this cake’s beauty is in the “flip” that happens when you remove it from the oven. It might sound intimidating, but it’s so much easier than you think! The result is a picture-perfect upside-down pineapple cake made from scratch. Beginner Sticky Orange Upside Down Cake Wonderful, wonderful, wonderful. Beginner Strawberry Upside Down Cake Perfect Dessert For The Summer! Beginner Upside Down Coffee Cake This is a gorgeous moist and gooey coffee cake! Use any type of fresh or frozen fruit, or combination of 2 fruits. Peach, cherry, blackberry and/or red raspberry are some of the best. The deep baking pan is required due to the bubbling caramel sauce and the height of the cake. 1 2 3 4 5 1 ... 1 2 3 4 5 6 7 8 ... 8
- Orange Blossom Syrup
< Back Orange Blossom Syrup The smell of this syrup is divine! And, if you have an English garden that you can borrow for the afternoon – enjoy! Previous Next
- Yarrow Tincture
Yarrow tincture is a simple alcohol extract with a number of uses, both internally and externally. < Back Yarrow Tincture Prep Time: N/A Cook Time: N/A Serves: N/A Level: Beginner About the Recipe Ingredients fresh or dried yarrow alcohol Preparation BENEFITS OF YARROW TINCTURE For many, many thousands of years, the medicinal benefits of yarrow have been used to treat an array of ailments. Yarrow helps prevent infection, is a natural analgesic, and reduces inflammation. For all of these same reasons, yarrow tincture is perfect when used externally to treat minor burns, cuts, bruises, and insect bites. Yarrow tincture may also be taken internally for a variety of issues. Yarrow contains bitter flavonoids, which are appetite-stimulating aromatic compounds that encourage saliva and bile production for healthy digestion. Its anti-inflammatory properties also help soothe gut inflammation, which can cause upset stomach or heartburn. A tincture made from yarrow flowers provides rapid relief from congestion or cough from a cold or the flu when rubbed into the chest. When taken internally, yarrow facilitates sweating and acts as an immune-booster, both actions that help your body get better, faster. Taken as a tincture or a tea, yarrow is a powerful anti-spasmodic that can be used to alleviate painful menstrual cramping and any intestinal distress that goes with it. YARROW CONTRAINDICATIONS Avoid taking yarrow while pregnant; by causing the smooth muscle lining of the uterus to contract, it could cause an accidental miscarriage. Yarrow should be avoided if you have an allergy to plants in the Asteraceae family (like daisies, ragweed, marigolds, or sunflowers). If you have a bleeding disorder, check with a health practitioner before using yarrow — in some cases it can prevent blood from clotting. HARVESTING YARROW FOR TINCTURE The best possible time to harvest wild yarrow is on a warm and sunny day, around mid-morning when the dew has evaporated off the leaves and flowers, but before the plant begins to droop under the hot sun. As with any foraging expedition, make sure you have permission to gather yarrow and that the plants haven’t been sprayed. To harvest yarrow, cut the stems about halfway down the stem. The flowers should be open and healthy-looking, avoid plants with brown, sad-looking blooms. At this point, you can dry the yarrow or, as I like to do for tinctures, use it after being freshly picked. If you don’t have any wild yarrow close by, you can also purchase dried yarrow flowers to use for making tinctures. Dried plant material has a maximum shelf life of two years, so if you already have dried yarrow at home make sure it’s relatively fresh. HOW TO MAKE YARROW TINCTURE Making a tincture at home requires very little in the way of equipment and ingredients. Essentially, all you’ll need is a jar with a tight-fitting lid, a funnel, cheesecloth, and vodka. For the jar, I recommend using a mason jar made with amber glass. A regular mason jar will work fine, but amber glass helps to block out sunlight and preserve the potency of the tincture. It’s no problem at all if you end up using a clear glass mason jar, you’ll just need to make sure you keep it stored in a dark place. When it’s time to decant the tincture, a basic funnel lined with a few layers of cheesecloth will work beautifully. I like to use Smirnoff vodka as the menstruum when I make tinctures (a menstruum is the term for the liquid in a tincture). It isn’t expensive, it has a clean taste, and it always produces excellent results. You can use any type of ethyl alcohol that’s at least 40 percent (or 80 proof ) alcohol such as brandy, gin, or rum. You don’t want to go any lower than this since you need the alcohol to act as an antibacterial agent, otherwise there’s more of a potential for spoilage. Never use rubbing alcohol (also known as isopropyl alcohol) for making tinctures as it’s toxic to ingest. If you don’t want to use alcohol, you can make another kind of herbal extract called a glycerite tincture with food-grade vegetable glycerin. The method is pretty much exactly the same, and I’ve included instructions in the notes section of the recipe card below. Traditionally, tinctures made with yarrow leaves are used externally, think cuts, burns, and bug bites, whereas tinctures made with yarrow flowers are taken internally for cold and flu symptoms. I sometimes just combine the leaves and flowers to make a multi-use tincture in a single bottle. While I’m on the subject of bottles, I always store finished tinctures in amber glass bottles that have a dropper. Tincture dosages are measured by the dropperful, which takes out all the guesswork, and the amber glass helps preserve and protect the contents of the bottle. To make a tincture with fresh yarrow leaves and flowers, roughly chop or grind up the plant matter — the more surface area that’s exposed the more potent the finished tincture will be. Fill a clean mason jar about 3/4 of the way full with chopped yarrow, resisting the urge to pack the jar too tightly. Completely cover the yarrow with vodka, or your choice of high-proof alcohol, and seal the jar with a lid. If you’re using dried yarrow flowers, you’ll only need to fill the jar 1/2 way full. Dried plant material is very concentrated when compared to fresh material and it absorbs liquid efficiently, which results in expansion as the tincture sits. Store developing tinctures in a cool, dry place away from light. Every couple of days, give the jar a gentle shake. If you notice the alcohol level lowering, add a bit more until the yarrow is completely covered again. The alcohol prevents mold growth from occurring, so keep a close eye on it throughout the process. Tinctures need about 6 to 8 weeks to develop before they’re at full strength. Although it might be tempting to strain earlier, that extra time will ensure you’re rewarded with an effective, super-potent tincture. When it’s time to strain your yarrow tincture, the process is easy. Simply line a funnel with cheesecloth, or if you aren’t working with particularly fine yarrow particulates, you can just use a fine mesh strainer. If using a funnel, strain the tincture directly into a glass bottle, squeezing the remaining plant material to remove every single last drop of liquid. ALTERNATIVES TO YARROW TINCTURE You don’t have to wait 6 weeks to enjoy the therapeutic benefits of yarrow, if you have fresh yarrow available you can quickly make a poultice to use for external wounds. Fresh yarrow leaves can be ground into a paste and applied directly to the skin in the event of cuts or burns. If you’re out on a hike or away from the campsite, you can even partially chew the leaves with your teeth until a rough paste is formed, although full disclosure: the leaves will be very bitter. To keep the poultice in place, cover it with a length of gauze or muslin and secure with a loose knot. Preparation Fill a clean, empty mason jar 3/4 full of fresh yarrow leaves and flowers or 1/2 full of dried yarrow flowers. Cover the fresh or dried yarrow with alcohol, making sure the contents of the jar are completely covered. Screw the lid on tightly and gently shake the contents of the jar. Place in a cool, dry location away from light, allowing the extraction to occur over the next 6 to 8 weeks. Give the contents of the jar a gentle shake every couple of days. Keep an eye on the alcohol level, adding more alcohol to cover the plant material if needed. Once the tincture is ready to be decanted, line a funnel with cheesecloth and place the tip of the funnel into the neck of a dark amber glass bottle. Pour the solvent and the yarrow leaves and flowers into the cheesecloth-lined funnel, pressing to make sure all of the liquid makes into the bottle. Label the tincture with its contents, date of production, recommended dosages, and suggested usages. Store in a cool, dry area away from light. NOTES *To make a glycerite tincture: cover the plant material completely with a preparation of 3 parts glycerin to 1 part distilled water. As the glycerite tincture develops, it will need to be shaken every day. MATERIALS Fresh or dried yarrow flowers and leaves, roughly chopped Vodka or other high-proof alcohol (*see notes for making a glycerite tincture) TOOLS Pint mason jar (or any other jar with a tight-fitting lid) Funnel Cheesecloth Dark amber dropper bottles Adhesive label or masking tape (for labeling tincture) Previous Next